Step 1: Setup Term Store Administrator
Open the Central Administration website and click the Manage Service Applications link.

Step 2: Click New Button.

Step 2: Select Managed Metadata Service

Step 3: Now Create New Managed Metadata service window opened, after fill Name, Database Server, database name ect...

Step 4: My managed metadata is Created.

Step 5: Goto Site Settings-> Click Term Store Management Tool.


Step 6: Right Click My managed metadata Create new Group.

Step 7: Created City GROUP here.


Step 8: Create a New Document Library.

Step 9: Add column of managed metadata

Step 10: Select your Metadata

Step 11: Click Ok button.

Step 12: Upload your file.

Step 13: Select your CITY

Step 14: Your file list.

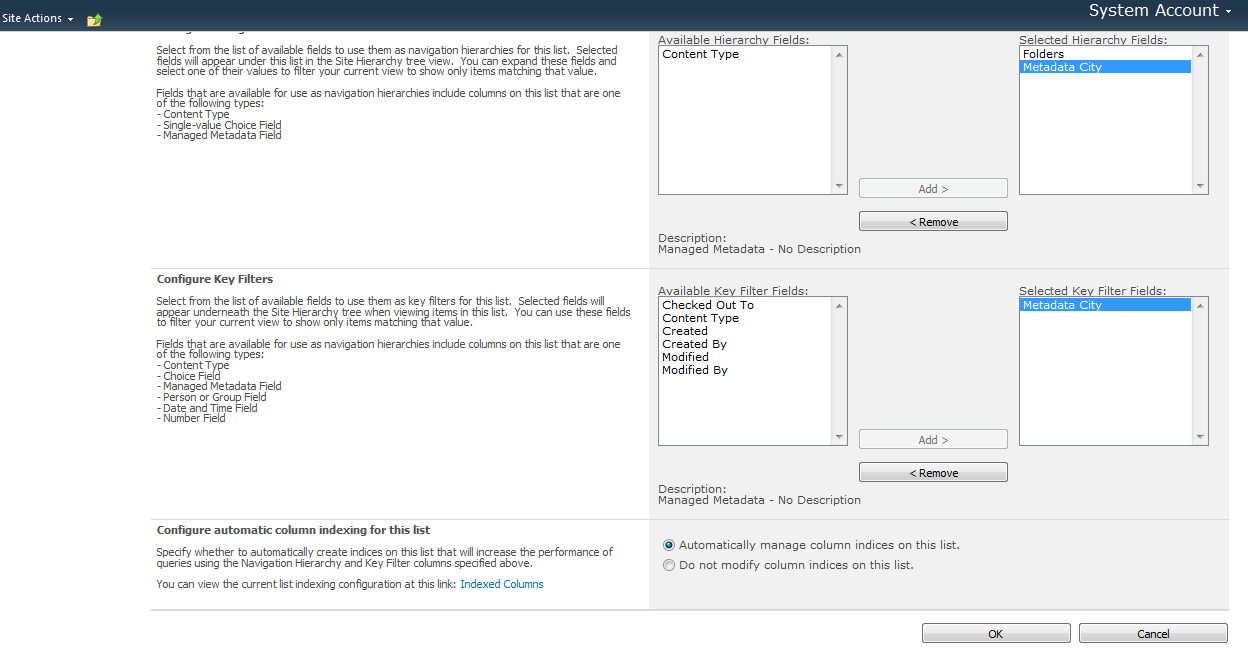
Step 15: Goto Document Library Settings-> Metadata Nacigation Settings.

Step 16: Output :) If you select "T Nagar", Only T nagar file display.
